
by kathilipp | May 14, 2013 | Clutter Free, Home |
 Every year, on May 15th, I like to remind women all over the world to clean out your purse, bag, backpack or computer bag. I’m passionate about this for several reasons:
- I’ve spent the better portion of my free time looking for car keys.
- I’ve also spent a large portion of my disposable (and not so disposable) income on chiropractors.
So I have a little passion around the topic.
So, I want you to take 5 minutes (truly) and clean out all the stuff that is physically and mentally weighing your down.
Follow our super-simple steps below, and then enter to win a set of the E-Bags Packing Cubes (that, if you read my blog or listen to my podcast, you know that I’m obsessed with…)
How to Clean Out Your Purse – 3 Simple Steps
I knew I had issues when I casually mentioned to Roger, “I wish they had purses with wheels on them.” His reply, “They do. They’re called suitcases – and you have a problem.”
I would love for you to have the feeling that wherever you go, you are not weighed down by “stuff”. (See my post Why Your Bag is a Reflection of Your Spiritual Life.)
Here’s my super-speedy way of cleaning out my bag.
Step 1 to Clean Out Your Purse: Sort It Out
I simply take my purse and dump it out into a plastic grocery bag. I sort the dump into Put Away, Put Back, and (in this case) Throw Away.
Put Away
Anything I want to keep that doesn’t belong in my purse gets put away. This is also when I go through receipts I’ve carefully placed in my wallet (or, more likely, the ones I’ve quickly thrown into my purse…) and random notes or other pieces of paper. If you’re away from home while you’re sorting, just put these items into another bag to put away when you get home. And when you get home, put them away in the right spot.
Put Back
If it belongs in your purse, go ahead and put it back into your purse.
Throw Away
Anything that’s left over in your plastic grocery bag (food wrappers, cash receipts you don’t care about, and so on,) is now garbage that gets recycled or thrown away.
The beauty of the grocery-bag organizing system is that you can do it anywhere, anytime. Just grab a grocery bag and start sorting while you’re waiting for your kids to get out of band practice or while you’re on the phone with your mom.
Step 2 to Clean Out Your Purse: Clean it Up
Give your purse a good shake and get out any stray bits, crumbs etc. I’ve even used a hand held vacuum to really get the bag clean.
Step 3 to Clean Out Your Purse: Label it and Put it Away
Assign a spot for everything that belongs in your purse, bag, or backpack. I use three zippered pouches. Everything goes into one of those three pouches or into your wallet (or in rare cases, onto your key chain). The fewer items you place in your purse, the easier it is to know what’s in there.
Wallet. I recommend you keep in your wallet only cash, receipts, checkbook, and credit, debit, and gift cards.
Pouch 1: Makeup bag
- Lipstick and gloss
- Eyeliner
- Powder
- Sunscreen stick
- Blush and brush
- Eyeglass cleaner wipes
- Hand sanitizer
Pouch 2: Emergency kit
- Fashion tape
- $20
- Needle and thread
- Nail glue
- Advil
- Couple of adhesive bandages
Pouch 3: Change Etc.
Other Things to Keep in Your Bag
- Sunglasses case
- Cell phone
- Keys
Keep It Up
Clean out your purse once a week and it really is easy to stay on top of it. It takes only a couple of minutes to keep it up, keep you organized, and keep you away from the chiropractor.
Do you have to do it exactly like this? No. I just want you to have a clean purse that is functional and doesn’t give you a hernia. So tell me here in the comments that you cleaned out your purse by May 18th (and I’d love to hear what the strangest thing you found in there was!), and here is what you could win:


The Grand Prize winner will receive this set of the E-Bags Packing Cubes.
And five runners up will receive a copy of The Get Yourself Organized Project (for you or a friend.)
Just comment below and you’ll be entered to win!!!
(US residents only.)

by kathilipp | Feb 20, 2013 | Home |
 KarenEhman.com
Funny, smart and real Karen is the deal. She’s with Proverbs 31 (so you know she’s good!) And can I tell you, I could spend hours on her amazing site, but let me give you a little cheat sheet:
If you are struggling with piles of papers, check out Karen’s Brain in a Binder (LOVE THIS…)
More of Karen’s Freebies Be sure to check out her Twenty 30 Minute Clutter Busting Ideas

askannamoseley.com
This is one of those sites that you come across when you’re googling questions like “How do I clean out my washing machine?” and “How do I get rid of a urine smell?” (If you’ve never googled this question, you’ve obviously never raised boys.) There is a lot of cleaning advice, a lot of organizing advice, and some good old fashioned genius advice. One of my favorite things is her Cleaning Checklist Printables (go ahead… go get them, I’ll wait…)
Something I LOVE: Anna is the daughter of a friend of mine, but I stumbled upon her one day when I was googling “How to clean between the glass on your oven door?” And this post popped up. Genius.

OrganizingPro.com
Marcia has been in the organizing game for a while and knows all the tricks – and she shares them with you – the organizing mentor you never had but desperately needed. One of my very favorite things about her site is all her great, funny and informative videos (warning, you could spend so much time watching her videos, you may just forget to cook dinner, as just a random example…)
Some of Marcia’s Great Downloads
And two more…
One Good Thing by Jilleee Great resource for all things homemade.
Becoming Minimalist Not really an organizing site, but when you have less stuff, you have less need to organize it all. LOVE this inspirational blog.
Tell me your best organizing tip (and feel free to steal from one of these sites and share it with us!) and you will be entered to win today’s prize pack of three books:
The Complete Guide to Getting and Staying Organized by Karen Ehman
Simplify Your Life: Get Organized and Stay Organized by Marcia Ramsland
and my book The Get Yourself Organized Solution.
Enter by Friday, Midnight – US shipping only.
THIS GIVEAWAY IS CLOSED!

by kathilipp | Feb 19, 2013 | Home, The Get Organized Project |
Get your free PDF download on organizing your laundry area. This is a 4-page excerpt from Kathi Lipp’s popular book: The Get Yourself Organized Project.
Get Your Free Copy Here
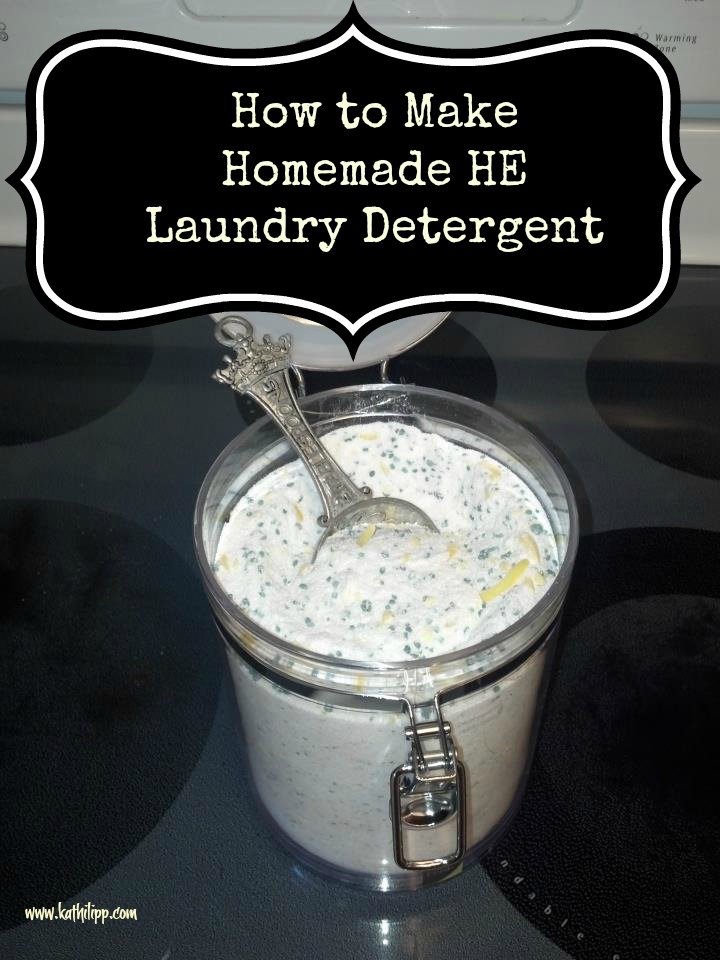
I’d heard of several people making their own liquid laundry detergent, but there was mixing and boiling involved and I thought “Ugh. No Thank you.” But ever since I’d read how much people were saving making their own detergent, every time I picked up the giant tub of suds at Costco and had to pay way too much money, it made my budget very, very sad. (I mean, you could buy three Costco Whole Roasted Chickens for the same price!) So when I saw a couple of people come out with this powdered Laundry Detergent recipe I knew I had to give it a try. Smells great, works great, super easy to make, and I got all the ingredients for under $35. (And I expect it to last at least six months.) The first question everyone asks me is “Are you sure it’s safe for HE washers?” All I can say is that I have scoured the internet looking for anyone who has had a problem with it and have yet to find someone. The main concern is that for HE washers you want a detergent that is less sudsy. Well I’ve sat there and watched my laundry go through a cycle with a store bough HE detergent and this homemade version, (and no, I don’t have better things to do with my time…) and the sudsing was identical. But, if you are of the super-paranoid variety, $12 a month is a small price to pay for peace of mind. My hubby is super skeptical of “alternative” anything, but even he was convinced to give this a try. So far, we are loving it. (Update – we’ve been using this recipe for over six years and have NEVER had a problem with it. So take that for what it is…)
How to Make Homemade HE Laundry Detergent
 Ingredients
Please visit the amazon.com links below to find the latest deals! 3 bars Fels Naptha, grated ($1.33 x 3) 1 box Borax ($5.75 – 76 ounces) 1 box Washing Soda ($4.00 – 55 ounces) 2 cups of baking soda ($0.65 cents) 2 containers of Oxyclean ($12.99 for 7.2 pounds) 1-2 containers of Purex fabric softener crystals ($6.97 – 28 ounces) (One bottle was plenty of smell for my gang!) We found all of the ingredients to make homemade HE laundry detergent at Target and at Amazon. I was not very patient to try this out, so I bought all the ingredients right away. Now I’ll be watching for them to go on sale to try and keep the price down even more.
Directions for making Homemade HE Laundry Detergent
 1. Start by grading the Fels Naptha. I see that most people do this with a hand grater, but the soap is not that hard and I was able to use my food processor to grate it all up. Most people want it more grated (and would use a different blade,) but I loved the cheesey look of it.
2. Next, mix grated soap and the rest of your ingredients together. It seems that most people mixed right into the tub where they were going to store their soap. I wanted to make sure it got completely mixed up, so I used a big black garbage bag lining my bucket and poured everything in there. (Another hint: do this outside! All the powder can be a lot to breathe in.) Gather up the top of your garbage bag and keep tossing all the ingredients over and over until fully mixed.
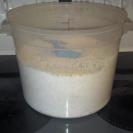
And here is your finished product. Store soap in a sealed container with a scoop. I transfer what I’ll need for a month into a smaller jar to keep in my laundry area. Use 2 Tablespoons of detergent for every load of laundry. Make sure to put the detergent DIRECTLY INTO THE TUB, not the detergent dispenser.
There are so many things I love about this homemade detergent. It is the ultimate Clutter Free way to do laundry:
- It’s Cheaper: I’m estimating this will save me between $80-$100 over then next 6-9 months
- Less Packaging: better for the environment
- Less Lugging: I hate with a fiery passion lugging all those giant items home from Costco, but love that I can pick up these small items and keep the tub in my garage
- Never Running Out of Laundry Soap – Priceless
And if you’re looking for a liquid detergent recipe, check out One Good Thing by Jillee And for a great stain removal system, check out how my sister-in-law gets out stains every single time. Q4U: Have you made your own laundry detergent before? Do you have other great, ideas about how to keep your bills down? Share them in the comments below. Get your free PDF download on organizing your laundry area. This is a 4-page excerpt from Kathi Lipp’s popular book: The Get Yourself Organized Project. Get Your Free Copy Here
by kathilipp | Feb 17, 2013 | Home |
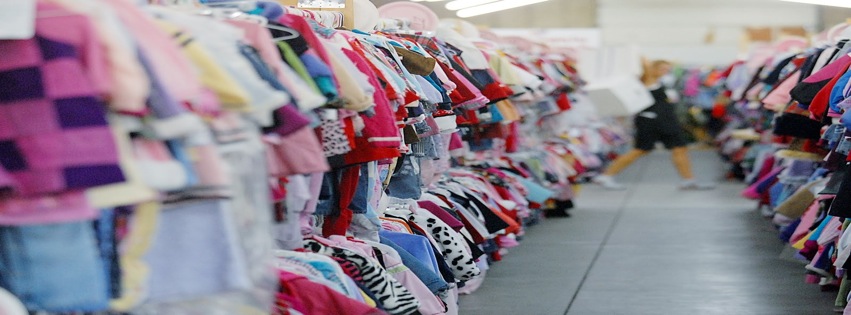
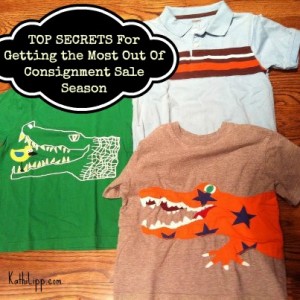 Kathi here: You know that I’m all about getting organized, and the fastest way to get organized is to GET RID OF STUFF. But it’s easy to get stuck when you don’t know what to do with all that STUFF. Plus, anytime I can buy something used and skip the manufacturer creating something out of new materials, it’s a win for everyone. So I asked my friend Jen, the owner of The Lollipop Market (a high end children’s consignment shop in my hometown of San Jose,) to share with us the basics of getting ourselves organized and making money with consignment. In the comments below, I would love to hear your best tips for consigning or other ways to get the most out of your children’s clothes.
If you are not familiar with seasonal consignment sale shopping, lean in, because I’m about to let you in on a few secrets that could dramatically cut your expenses.
Since I started shopping and selling at consignment sales 4 years ago, I have spent less than $150 a year, per child, on clothing, shoes, and costumes for my daughters. Along the way, I’ve learned a few secrets of successfully shopping and selling at consignment sales. I’d love to help you get organized to do it too!
Consignment shopping combines all the best parts of ebay, craigslist and garage sales: highly discounted prices on gently used items – without the worst parts: shipping fees, no-shows, and limited selection.
5 Things Every Shopper Should Know:
- Bring a list of exactly what you need. To do that, you need to know what you already have. Take the time to go through next season’s clothes. Then, you can see exactly what you need and you won’t end up with 15 pairs of shorts, but no jeans/skirts or shirts that match.
- Take the time to match outfits with shoes! Shoes are expensive, and you can find some great deals at consignment sales. Make a list of what types of shoes you are missing for each child. For example: this spring/summer my 3 year old has white sandals but needs flip flops, nicer buckle shoes, and pink sandals would be nice.
- Volunteers shop first, so get involved. The best stuff goes quickly, so shop early. Think you don’t have time? Most consignment sale owners will barter with you. Offer to distribute fliers, put up posters, bring snacks, or come up with your own idea. Be creative and save some big money!
- Shop from oldest to youngest. The larger sizes will have the smallest amount of inventory, so if you are shopping for multiple children, shop for the oldest child first and work your way down.
- Shop the sizes bigger and smaller than your children actually wear. Brands fit very differently, and you will find more deals by shopping more broadly.
Now, let’s talk about selling. The biggest benefit of consigning at seasonal sales is that you get to keep a higher percentage of your earnings than at traditional brick & mortar consignment shops.
3 Things to Make Your Consignor Experience a Snap:
- Start early! Set apart one week to gather. The next week, hang. Then, sort by size/sex, price and finally pin tags on. Don’t save everything for the last minute! I’ve posted a room by room checklist HERE.
- Price fairly. Pricing is highly subjective, and can be difficult to navigate. A great pricing resource can be found HERE. Remember that shoppers are at the consignment sale to find a deal, so don’t lose a sale over $1.
- Match sets together. As a rule, outfits sell better than individual pieces. Groups of 2 shirts or shorts sell better than individual ones. UNLESS it’s brand new or super cute, give someone a deal on a group of items.
Want to find a consignment sale in your area? Consignment Mommies is a great resource and you can search by zip code. Happy shopping and selling this consignment season! Jennifer Scoggins owns The Lollipop Market, an upscale seasonal consignment sale in San Jose, CA.

by kathilipp | Jan 7, 2013 | Home, The Get Organized Project |
Get Yourself Organized in 2013: How to Organize Toys (Your Kid’s or Yours)
I was sitting down with a couple of young, got-it-together moms, brainstorming areas of the house that they needed help with getting organized. When one of them said “Toys” they looked at each other and said “YES!”
Oh I remember the days of stepping on Barbie’s shoes and seeing my living room covered in car tracks. The toys seemed to take a life of their own and movie around at night after I’d cleaned them up. The movie “Toy Story” seemed more like a documentary to me than a cartoon.
If you don’t have kids, or your kids toys are things like iPads, then choose an area of your own “toys” to start working on. Maybe it’s a hobby, a craft area, the “sports area” of your garage, or a collection of some sort – the principles are the same.
When it comes to toys (or almost any other area of your home,) the most important thing to do is figure out what you are keeping, what you are giving away, and what you are recycling/throwing away.
- The first thing to do is to get all the toys into one area. (If you have more than one major area for toys, say your daughter’s room and your son’s room, or a play room and a child’s room, work on one area at a time.) Get stray toys and toy parts into the toy area.
- I highly suggest my Three Boxes, Two Bag Method in quick cleaning any area.
- As you are sorting through toys, realize that the reason they are often so hard to organize if there are probably plenty of things that your kids no longer use floating around in there. The less you have to manage, the easier keeping organized will be.
- When you are done with this process, you will have a bag of things to recycle, a bag of trash (how did garbage get into the kids toy box? It’s always a mystery…) a box of things to donate, and a box of things to put back into other rooms of the house. (Like stray shoes, socks, the dog’s collar, etc.)
- Now that you’re starting with a clean (or cleaner) area, it’s time to take a good hard look at what kind of toys your kids have, and how to organize them. Your daughter who keeps a vet office worth of stuffed animals has different needs than your so who collects Matchbox Cars. Here are some ideas from some smart and toy-savvy moms.
Toy Management
Creating a Toy Library
“Turn a closet into a “toy closet” All toys are stored in organized, labeled containers and kids can only play with one bin of toys at a time. They have to turn in one bin before they can play with another!” Alexia Staelens
Stuffed Animals
“A toy hammock is a great idea, the kids can just toss stuffed animals up there and off the floor.” Robin Neil
A Million Little Pieces
“I think I should write a book called 101 uses for an over the door shoe organizer. They work here too, especially for a girls room! Think Barbies, Barbie clothes, Polly Pockets, etc. Avoid toy boxes or anything deep that is the chasm of hopelessness! Toys go in but they don’t come out! (well at least until you have thrown away every other part to the toy, THEN it shows up!)” Robin Neil
“I’m a Lego organizer freak these days. Directions, pieces all in a see through container with a photo label on the box. Yes, they are kept up so a parent has access to hand out. Bins for easy clean up and a designate area for play. I have let go of “perfect” separation of toys, as long as the boys are happy and can find their stuff, I’m happy.” Stephanie Helder
Less is More
“Rotate toys—less toys equals more attention focused on what they do have. Have the children pick 3 or 4 “favorites” at a birthday or Christmas and put the rest out of sight. When their interest starts to fade with, say, the tea set Aunt June got them, you put it in the closet and pull out the box of dress up that Grandma sent. We go through every 3 months or so and switch out toys (right now its dress up, art tower, 4 board games & Lego’s). Christy Taylor
“Spring Cleaning” happens every season at our house. After birthdays and Christmas, we also have a “Donation Station” where my kids can search through their piles of toys and other things that have accumulated and give them to the Salvation Army or other charity. We throw the m in a huge bag and donate away.” Jenny Sulpizio
“Each birthday and Christmas the boys have to ‘give to others who have less than they do.’ For every new toy that comes in, one goes out. It’s a lesson on giving and curbs the over-abundance of ‘stuff.’” Stephanie Helder
Oh – and to keep track of all those Birthdays and other special celebrations, for members of my Facebook Page you can download a year of beautiful calendars to track. I use these in conjunction with my stockpile of birthday and anniversary cards to stay on top of sending a little love. (Plus I keep a stack of Starbucks cards – just in case.) Go over and download it now!
Tell me your best toy organization trick in the comments below.

by kathilipp | Jan 2, 2013 | Home, The Get Organized Project, Uncategorized |
It all started when I couldn’t find my eye cream.
I’d been talking with a friend who was going on and on about the great eye cream she’d been using, and I thought it was the same one I bought a few months ealier, so I wanted to go home and give it a try that night.
The only problem? I couldn’t find it.
Was it on the counter with the products I used every day?
Was it in the basket of facial products in under the sink?
Was it with my travel stuff?
Had it migrated (my cosmetics have a tendency to do that with a visiting 20 year-old daughter stopping by…)
I had no idea, so the next time I was out shopping, I picked up a little bottle of the magic lotion. Problem solved.
And then, the next week, I was retrieving a tube of toothpaste from our hall closet and that’s when I found it: the original eye cream jar. And suddenly, that 1 ounce jar weighed a pound in guilt.
How much money have I wasted in “replacing” things because I didn’t have an easy way to find them?
How much time have I wasted going to the store to “replace” those things?
How many times have I not contributed financially to a cause I believe in because I’m short on funds (from re-buying things)?
In 2013, I’ve made a pledge to “Use it or Lose it”. I’m committed to not buying things unless I can determine that we are absolutely out of that item. I’m going to reduce clutter in our home by not keeping around items that I will never use.
Each week I’m going to concentrate on one tiny area of my home and life to de-clutter, organize, take stock of and manage. But this isn’t just about clearing the clutter – it’s about managing the resources that God has trusted our family with. Our goal in each area is to use what we have, make do, make it last, wear it out, and when need be, replace it responsibly.
The other part of this is that I want to experience the peace that comes with knowing what we have, having less of what we don’t need, and being free to give away those things that weigh us down mentally, physically and spiritually.
I’ll be blogging through my adventures in minimizing, clearing the clutter and freeing up time and space in our home.
I would love to hear from you which parts of your house you want to get under control, so I can make sure I hit it.
 Every year, on May 15th, I like to remind women all over the world to clean out your purse, bag, backpack or computer bag. I’m passionate about this for several reasons:


