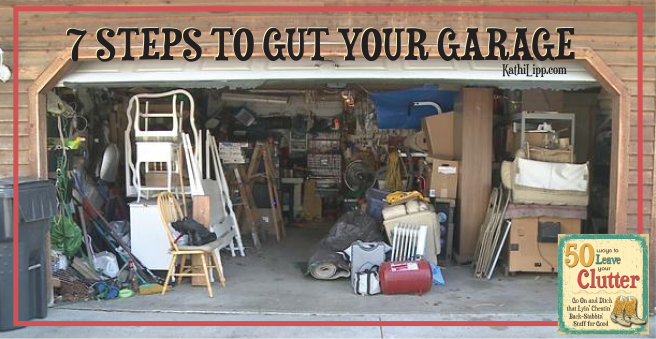
Last January, Kathi issued a de-cluttering challenge that motivated me to finally gut my garage.
Now I don’t have an organized bone in my body; I’m the total “Queen of Chaos” type.
But by the end of the month, I’d taken several car-loads to Goodwill, sold a handful of items on eBay, and thrown out an astonishing amount of trash.
Here’s what worked for me as I transformed our garage from catastrophe to functionality.
Step 1: Determine your priority needs.
We don’t park our cars in our garage. Our top priorities are:
a) Plenty of space for Daniel’s workbench and tool cabinet
b) Easy access to the elliptical and Daniel’s weight bench
c) Easy access to frig and pantry
d) Easy entry/exit for cats
Your priorities are probably different from ours. Once you know what they are, they will guide all the rest of your decisions.
Step 2: Loan useful items that aren’t getting used
Check the layer of dust on all meant-to-be-used items. This includes, but is not limited to: golf clubs, backpacks, and sewing machines. I loaned my high-end serger, which I’d not used in six years, to a co-worker. She’s put it to good use, cranking out dozens of blankets and hats for homeless shelters.
Step 3: Evict all occupants of the “Needs Repair Graveyard”
Yes, I know, they could be repaired. And you probably would, if only you had time. But if you haven’t yet, chances are you won’t. Say farewell. I promise you won’t miss them…or the guilt you feel every time you walk by and hear them whisper “fix me!”
Step 4: Consolidate and strategically store holiday decorations
If your holiday decor has multiplied over the years until it’s taking over several separate sections of the garage, it’s time to rein it in. Take the time to sort through it with a critical eye. Give-away anything you don’t love, and store the keepers in containers you can move without help or injury.
Step 5: Check and chuck old paint cans, cleaners, and other chemicals
Rust or dust on any of these means they’re not getting used. Properly dispose of any that are expired or beyond use. Give yourself 3 months to use or give away anything that’s still good. (Highly Practical Hint: Consider storing touch-up paint on a high cupboard shelf in the room it matches!)
Step 6: Flatten and recycle boxes
I know how hard it is to get your hands on good boxes when you need to ship something or when it’s time to move. I also know how “good” boxes can overcrowd an otherwise spacious garage! At the very least, flatten them; they’ll take up lot less space, and you can re-build them as you need them.
Step 7: Toss trash
This step seems like such a “no duh,” but it’s amazing how quickly trash accumulates. Do you have a good-sized trash can in your garage? If not, get one and keep plenty of bags near it.
 Cheri Gregory is a Certified Personality Trainer; contributor/co-author of a dozen books, including 21 Ways to Connect With Your Kids (with Kathi Lipp); and frequent speaker for MOPS groups, women’s retreats, parent workshops, and educational seminars. Cheri has been “wife of my youth” to Daniel a pastor, for over a quarter-of-a-century; they have two college-aged kids. She blogs about expectations, “baditude”, and hope at www.CheriGregory.com.
Sign up for Cheri’s new blog and receive a free download of 50 Ways to Leave Your Clutter!


Hellko evry one, here every person is sharing such experience, therefore it’s
pleasant to read this blog, and I used to pay a quick visit this bloog daily.
I would never have thought to loan out items not being used, but obviously don’t want to get rid of….what a cool idea!
Thanks for the tips, Cheri! Our house looks decent, but the garage, which is one-car and does house our one car, definitely needs some work.