
by kathilipp | Dec 30, 2014 | Clutter Free, Podcast, The Get Organized Project, tips and ideas |
Clutter Free in 2015!
Are you motivated to get (and keep) yourself organized this year? We talked to our own in-house clutter expert and the author of Clutter Free (yes, it’s Kathi) about going clutter free for 2015. Listen as Kathi tells you how to:
– Sort through your stuff to decide what to keep and what to get rid of.
– Find a space for everything and a use for everything you have.
– Lead your family by example as you get your house organized.
– Get your life in order so that you can feel sane this year.
Listen in and then pick up a copy of Kathi’s new book, Clutter Free, and get started on a new and organized year.
Don’t forget to sign up for the 21-Day Clutter Free Challenge!
Cheri Gregory is a Certified Personality Trainer; contributor to multiple books, including Wired That Way and 21 Ways to Connect With Your Kids; and frequent speaker for MOPS groups, women’s retreats, parent workshops, and educational conferences. She’s been married to her college sweetheart, Daniel, for twenty-five years and they have two young adult children, Annemarie and Jonathon.
She blogs about expectations, “baditude”, and hope at www.CheriGregory.com. Connect with her on Facebook and Twitter.

by kathilipp | Dec 29, 2014 | Christmas, The Get Organized Project, tips and ideas |
Welcome to the Five-Day Christmas UN-Project — Putting it away well…so there will be less drama next year!
Hi Friends – I hope you had an amazing Christmas with Christ at the center of it all. Now that you’ve had a day to recuperate and clean up some wrapping paper, I want to give you an opportunity to pack up, clean up and put up the trimmings well so that next year, it will be drama free.
We will have a five day un-project. Starting on Wednesday morning, I will give you five days of instructions so that next year, you will have a head start on everything Christmas!
If you’re not already signed up for the blog, just go to KathiLipp.com and sign up. You will have each and every project delivered to your inbox.
Are you ready to be Clutter Free? Start the 21-Day Clutter Free challenge! Sign up now!
Blessings on you this week friends!
Kathi

by kathilipp | Dec 23, 2014 | Christmas, The Husband Project, tips and ideas |
Have I got some Red Gift ideas for you? Make Christmas fun for your man by buying him a few of these items!
1. Lingerie (for him to open, but you to wear)
2. A box of Red Hots with your husband’s picture on it.
3. Matching boxers
4. Warming lotion (use a coffee warmer to keep it warm)
5. PJs (You wear the top, he wears the bottoms)
6. A card with 10 reasons why you are grateful for everything he does
7. 21 Post it notes around your room of reasons you love him
8. Mistletoe on the headboard of your bed
9. A box of chocolates (with instructions for the two of you to share them in bed.)
Don’t forget to listen to this week’s podcast – Naughty…and nice holiday gifts for your man — RED GIFTS!
Photo courtesy of Free Digital Photos. (http://www.freedigitalphotos.net/images/Christmas_g54-Santa_Woman__Holding_A_Gift_Box_p123859.html)

by kathilipp | Dec 10, 2014 | Christmas, tips and ideas |
 It’s beginning to look a lot like Christmas! The Holidays are here! How’s everybody doing? Hanging in there? Remembering to breathe and focus on the real reason we celebrate this season?
Need something to make your life a little easier right now?
Here are some of the quick tips and time-savers we’ve come up with to help make this Holiday a wonderful time for you and your family!
If you missed this week’s podcast on our Top 5 Holiday Hacks, take a few minutes and listen in now!
Looking for something to give someone for Christmas who is having a hard time making ends meet? Check out our ideas!
Podcast 128 was all about saving money for Christmas without sacrificing the things that matter and making things less stressful!
Are you looking for easy gifts to give that don’t require a lot of (if any) wrapping? Check out this post!
And if things in your life are just too crazy, maybe you should check out my book Get Yourself Organized! 21 Steps to Less Mess and Stress! (This is an Amazon affiliate link.)
Have a great week!
by kathilipp | Dec 2, 2014 | Christmas, Podcast, tips and ideas |
Do you feel your shoulders getting more and more tense as the days to Christmas tick down? Ready for a less stressful Christmas?
![No-is-Not-a-4-Letter-WordFB[1]](https://www.kathilipp.com/wp-content/uploads/2014/11/No-is-Not-a-4-Letter-WordFB1-300x300.jpg)
Kimberlee Stokes, the author of Stress Free Holidays, walks you through her totally doable tips (hint: She got rid of her Christmas tree and makes popcorn for gifts!) to make this holiday season simple and joyful. Listen in as Kimberlee shares her ideas on how to:
- Make gifts without feeling stressed about crafting
- Save money for Christmas without sacrificing the things that matter.
- Choose which events truly matter (and which will only leave you feeling overwhelmed.
- Get rid of the clutter in your home and life to keep your stress levels down.
Listen in and get ideas to keep your holiday low-stress, plus get a free download of Kimberlee’s Candy Cane Bath Salts recipe.
FREE DOWNLOAD
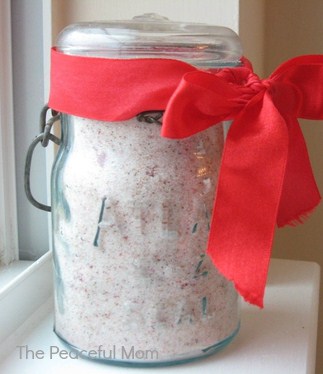 Don’t miss out on this awesome Candy Cane Bath Salt recipe! Click here!
Kimberlee Stokes is the happily married mom of four teens and the owner and editor of the popular website ThePeacefulMom.com where she gives women encouragement, inspiration and practical tools to save money, get organized and enjoy life.
In her latest e-book Stress Free Holidays Kimberlee shares real ways to simplify, save money and stay sane this holiday season including a free holiday planner.
by kathilipp | Nov 24, 2014 | Christmas, Podcast, tips and ideas |
WHAT TYPE OF BLACK FRIDAY SHOPPER ARE YOU? The one that’s standing at the store door chanting “open… open… open” at 4 am… or the kind that stays home and drinks coffee while the rest of the crazy people are, well, being crazy.
Whatever type of shopper you are, we have the tools and tips you need to rock your shopping list this Black Friday. Shellie Deringer from www.savingwithshellie.com gives you loads of expert advice on everything from finding the best deals to sticking to your budget.
Find out:
- How to do your holiday shopping on a realistic budget.
- Where to get the best deals for your family?
- What are the best deals for this Black Friday for everyone on your list?
- How do you know if something is a really good deal?
- And much more…
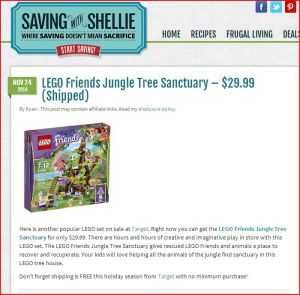
Listen in, and then click here to find Saving with Shellie’s best shopping deals for Black Friday to get your shopping done fast and within your budget.
There’s lots of deals to be found on Saving with Shellie!
Shellie Deringer founded SavingWithShellie.com in January 2009 as a resource for moms struggling to reconcile their pre-baby lifestyle with post-baby budget busters. Shellie works to show moms that by shopping diligently and purposefully, they can afford the quality brands they love without exceeding their budget. Saving money isn’t about sacrificing quality for price or sacrificing precious time to save a few pennies. You can be a brand loyalist without breaking the bank.


![No-is-Not-a-4-Letter-WordFB[1]](http://www.kathilipp.com/wp-content/uploads/2014/11/No-is-Not-a-4-Letter-WordFB1.jpg)


