by kathilipp | Jul 29, 2015 | Blog |
5 Ways to Connect Better with Your Kids by Paula Tobey
Have you ever had an encounter with one of your children that left you feeling like the ‘bad guy’? Either there was eye rolling, or stomping and yelling, or even better – a door slammed on your hand (check out my article about that one here http://phemomenallife.com/need-god) and all you could do was pray or kill a kid, lol. Well here are five great tips for you to have a better relationship with your child that will help prevent any of this from ever happening!
Believe it or not, kids need love. They don’t act like they do (and the older they get they may tell you often they don’t) but they do. The ‘kind’ of love is what is in question. Sure as anything, that too changes as kids grow. They want to show love to you. It’s just differently than before. Less kisses and hugs and more ‘trust’ or privileges. Kids need to feel like they have some control, and if that means telling you to stop kissing them at the bus stop, then they will use what works. Just remember, they do love you! Help them feel loved and respected by trying these tips:
- Know your kids – Can you tell someone with certainty what your child’s favorite activity is, favorite show or book? Can you list off some of their closest friends? What makes your kid tick? Make sure to listen to your child’s interests and pay attention to what they talk about. Ask questions.
- Accept your child where s/he is – The truth is: kids grow up, and they all do it at different times (although research shows it is happening at an earlier age than ever before). We need to be aware that they might just be ready for the next stage, so we should love and respect them where they are.
- Encourage good decisions and positive interactions – When your child does something that is nice or helpful, make sure to comment on it. Positive reinforcement goes much further than negative reinforcement. Negate the nagging! If you don’t like to be nagged by your mother or spouse, why do you think nagging your kid will get them to do much of anything? Give choices and ask them questions like “what are you supposed to be doing right now” rather than “do your homework”. Then after they answer, suggest they can do “A” or “B” and be okay with their choice even if it involves consequences.

- Share some personal things – Kids do want to hear from you. Share with them some of your struggles. Tell them you had a hard time with X, and you don’t want to see them struggle, and that is why you care so much what happens. If they hear from you and your ‘pain’, they are more willing to be understanding and listen to you.
- Be available – When kids get home from school, most of them want to wind down a little bit. Give them some space for a few minutes but then engage with them over a snack or in the car. You never know when they’ve had a really bad day and need to talk. Most kids are just waiting for the chance to feel loved. The more available we are to them, the more likely they are to open up to us when needed.
For more great tips on parenting practices, check out all of my blog posts. http://phemomenallife.com/category/family
Do you want more great information to make your family the best it can be? Subscribe to my blog and get weekly posts and encouragement to help you on your parenting journey. http://phemomenallife.com/
Paula Tobey is founder of PheMOMenal Life Ministries a community for women to go get encouraged and equipped to be the best mom’s they can be to their children by living a healthy balanced life and by becoming all that God created them to be.
Photo credit

by kathilipp | Jul 23, 2015 | Blog |
Guest post by Paula Tobey
Dear Clutter Free Friends,
When was the last time you looked under your sink? Was it when you were frantically looking for the Resolve carpet cleaner for the spilled coffee? Was it when you could not find the pot scrubber brush for the burnt on macaroni? I bet it has been a while. At least it had been for me! I don’t often think to clean out under my sink, but let me tell you when you do a whole lot can be found under there, and you can actually organize it!
This Week’s Maintenance Challenge:
Go through the cabinet under your sink by emptying it. Wipe it down top to bottom. Find all of the items that are practically empty and throw out any of them that are old, expired or you don’t remember what they are for anyway.
Put back the items that:
- Are necessary but contain harmful chemicals (toward the back of the cabinet). Ammonia, Air Fresheners, Bleach, Carpet Cleaner, Dishwasher Detergent, Furniture Polish, Oven Cleaner etc.
- You use often (toward the middle). This would be trash bags, stack of cleaning cloths etc.
- Smallest items can be placed in the front — such as brushes, sponges, and plugs for the drains.
When you use this simple but effective way to organize your sink cabinet, you will be able to find what you are looking for easier, limit the need for gutting the entire thing each time you need some cleaner and keep a safer home in case a pair of little fingers wonder into the cabinet. Also consider going online to get “Mr. Yuck Stickers” from Poison Control if you have young children OR elderly people living in your home. This will also help keep accidents down if they are visibly aware of what is safe and what is not. You can also get baby proofing magnets. These are an easier way to lock cabinets and don’t scrape fingers trying to find little plastic hooks inside the cabinet door. Magnets need to be placed in the correct position and a small child will not be able to find it where as an elderly adult probably could.
Want More Fun? Join the Clutter Free Facebook Community!
https://www.facebook.com/pages/Clutter-Free/410093652478105
Looking for More ways to Clean the Clutter? Try the 3-Bag Combo!
http://shop.kathilipp.com/product/clutter-free-3-bag-combo/
Tell us how many items you found under the sink that could be thrown away. Tell us how many bottles you had of the same thing that were all half full. Join in and have some fun with this.
For great ideas on making your marriage more connected and fulfilled, come on over to my Facebook page, https://www.facebook.com/ParentingCoachPaula and check out the posts, books and videos.
Paula Tobey is founder of PheMOMenal Life Ministries a community for women to go get encouraged and equipped to be the best mom’s they can be to their children by living a healthy balanced life and by becoming all that God created them to be. For more information go check out her website here www.PheMOMenalLife.com

by kathilipp | Jul 22, 2015 | Blog, Hot Mamas, Uncategorized |
When was the last time you and your husband went out on a hot date?
Remember back when you were first married? The romance, the candlelit dinners, the anticipation of that good night kiss . . . and then you had kids.
Let’s be blunt: kids, while adorable and lovable and a gift from God, are romance killers. Suddenly come-hither looks are replaced with bleary-eyed glances accompanied by the vague notion that the guy across the dinner table looks familiar, but you just can’t quite place him.
Well, that guy is your husband and the two of you deserve more! It’s time to put your marriage first, to commit to intentional (and intense!) romance. We all have budgets and packed schedules, so inside this short ebook you’ll find tips and tricks that fit your lifestyle.
 If you’re ready to fall in love all over again, you’re ready for this Hot Mama Challenge!
Get the eBook or paperback version of 10 Hot Date Night Ideas for Married Couples today and get your hot dates back!
And if you like this, you’ll love Kathi and Erin’s full-length book, Hot Mama: 12 Secrets to a Sizzling Hot Marriage due for launch in August and the other eBooks in the series, 10 Quick Fashion Fixes to Feel Confident and Sexy, and 10 Ideas to Inspire Red Hot Sex.

by kathilipp | Jul 8, 2015 | Blog |
Guest post Paula Tobey
Dear Clutter Free Warriors,
Is there not anything worse than when you are frantically searching for the plastic container lid to give to your company as a parting ‘thank you’ from the feast you just enjoyed, as they are ready to leave – only to be missing the correct fitting lid? Am I the only one that can’t seem to find the right lids when I need them the most? I mean really, why do we keep Tupperware, Ziploc or even Cool-Whip Containers when we cannot even find their correlating lids? Or better yet, you have tons of lids and no containers- because if push came to shove, you could put the food in a container and then put plastic wrap on top (and of course secure it with a rubber band because the wrap really does not stick even though it claims to). How come I can’t ever have enough containers? Well, I decided one day to go on a hunt to figure out this mystery and here is what I found.
We need containers! Containers are awesome and they are useful on so many levels. We put all kinds of things in them and don’t even realize we are doing it! When I went looking I found two in my master bathroom. One had a sponge in it and was used to hold the sponge (and its contents) while cleaning, and the other was holding hair bands, elastics and headbands. I then went into my kid’s bath thinking I’d find similar things, I found another two containers. One had homemade bath soap (which smelled pretty nice!) and the other had teeny tiny plastic pieces much resembling Barbie doll shoes or Polly Pocket type toys in it. I then went to my fridge, and oh boy….. I found my problem. Way too many left overs- experiments actually, and so I needed to clean the fridge out! So there you have it. We loooovvveee our plastic! Here are some basic things you can do to be sure you keep the ‘good stuff’ and recycle the rest.
This Week’s Maintenance Challenge:
- Go through your cabinet that contains your plastic ware. Gut it. Sort out the stuff that is good, bad or ugly. Recycle any of it that is cracked, stained, missing the lid (permanently) or you are not sure where the lid is now.
- Take the big pieces for lots of food, storing big items or used for a purpose like freezing or marinating and nest them on the bottom.
- Take your medium sized ones that you use frequently for leftovers and nest them in the middle.
- Take the smallest ones and nest them on the top.
- Put all of the lids (that match the container) near it so it can be found easier.
- Recycle any that have no mates or are just ugly.
- Vow to repeat this process in another three months.
It really can be quite simple to do this process when it is on your radar. Make a point to stay on top of it before it is out of control. (Now I know you are thinking this would be great if it weren’t your toddler’s favorite place to play. Which IS understandable, but while you are at it, teach that precocious little primate that important concept of clean up time by sharpening his or her mathematical and spatial reasoning by showing them how to sort, nest and store away those ‘fun toys’. It’s never too early for that!
For More Help and Support, Join the Clutter Free Facebook Community
https://www.facebook.com/pages/Clutter-Free/410093652478105
Looking for More ways to Clean the Clutter? Try the 3-Bag Combo!
http://shop.kathilipp.com/product/clutter-free-3-bag-combo/
For great ideas on making your marriage more connected and fulfilled, come on over to my Facebook page, https://www.facebook.com/ParentingCoachPaula and check out the posts, books and videos.
Paula Tobey is founder of PheMOMenal Life Ministries a community for women to go get encouraged and equipped to be the best mom’s they can be to their children by living a healthy balanced life and by becoming all that God created them to be. For more information go check out her website here www.PheMOMenalLife.com

by kathilipp | Jun 16, 2015 | Blog |
Can you handle six days in the Caribbean? I know I can!
Why don’t you join me, Cynthia Ruchti and Carol Kent on April 9, 2016 for a refreshing and inspiring time together. Did I mention it’s in the Caribbean? I’m talking fresh ocean air, ship activities, beautiful scenery and exciting excursions in the ports, PLUS the fellowship of Christian women on the cruise. You’ll be inspired with messages and drawn closer to God so that you can experience the abundant life Jesus came to give!
For more info about the cruise, visit Educational Opportunities Tours!
[Tweet “It’s Caribbean cruise time! Come join Kathi Lipp!”]

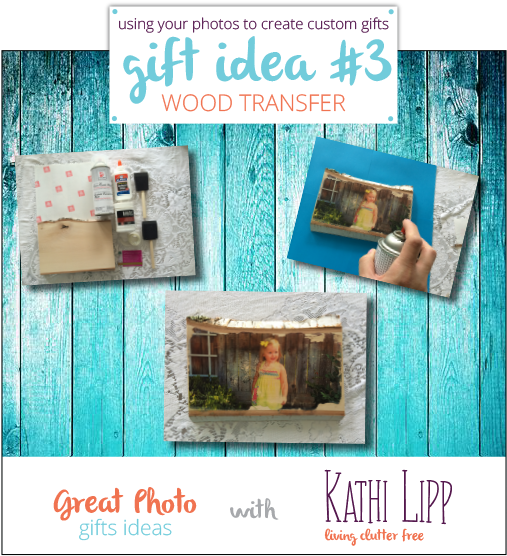
by kathilipp | May 27, 2015 | Blog, Gifting |
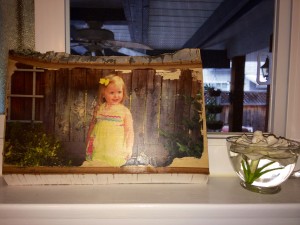
In the last installment of our custom photo gift series, I wanted to aim for something different for good ole’ dad. Dads can be the hardest person to find a gift for and you don’t usually think of him as the recipient of a photo gift. However, I think this wood transfer idea says manly and heartfelt, perfect for Father’s Day!
What you need:
 A piece of Wood— the possibilities here are endless. Make sure you sand down and clean off the surface you are transferring to for best results.
Inkjet printer
Shipping labels
Matte finish sealer spray
Matte gel medium
Clear drying glue
2 foam brushes
Credit card or gift card
What to do:
1. Remove the labels from the shipping labels and throw them away. The parts you want to use are the backing of the labels.
2. If there are perforated seams on the back of the paper, tape them so they don’t break during printing or application.
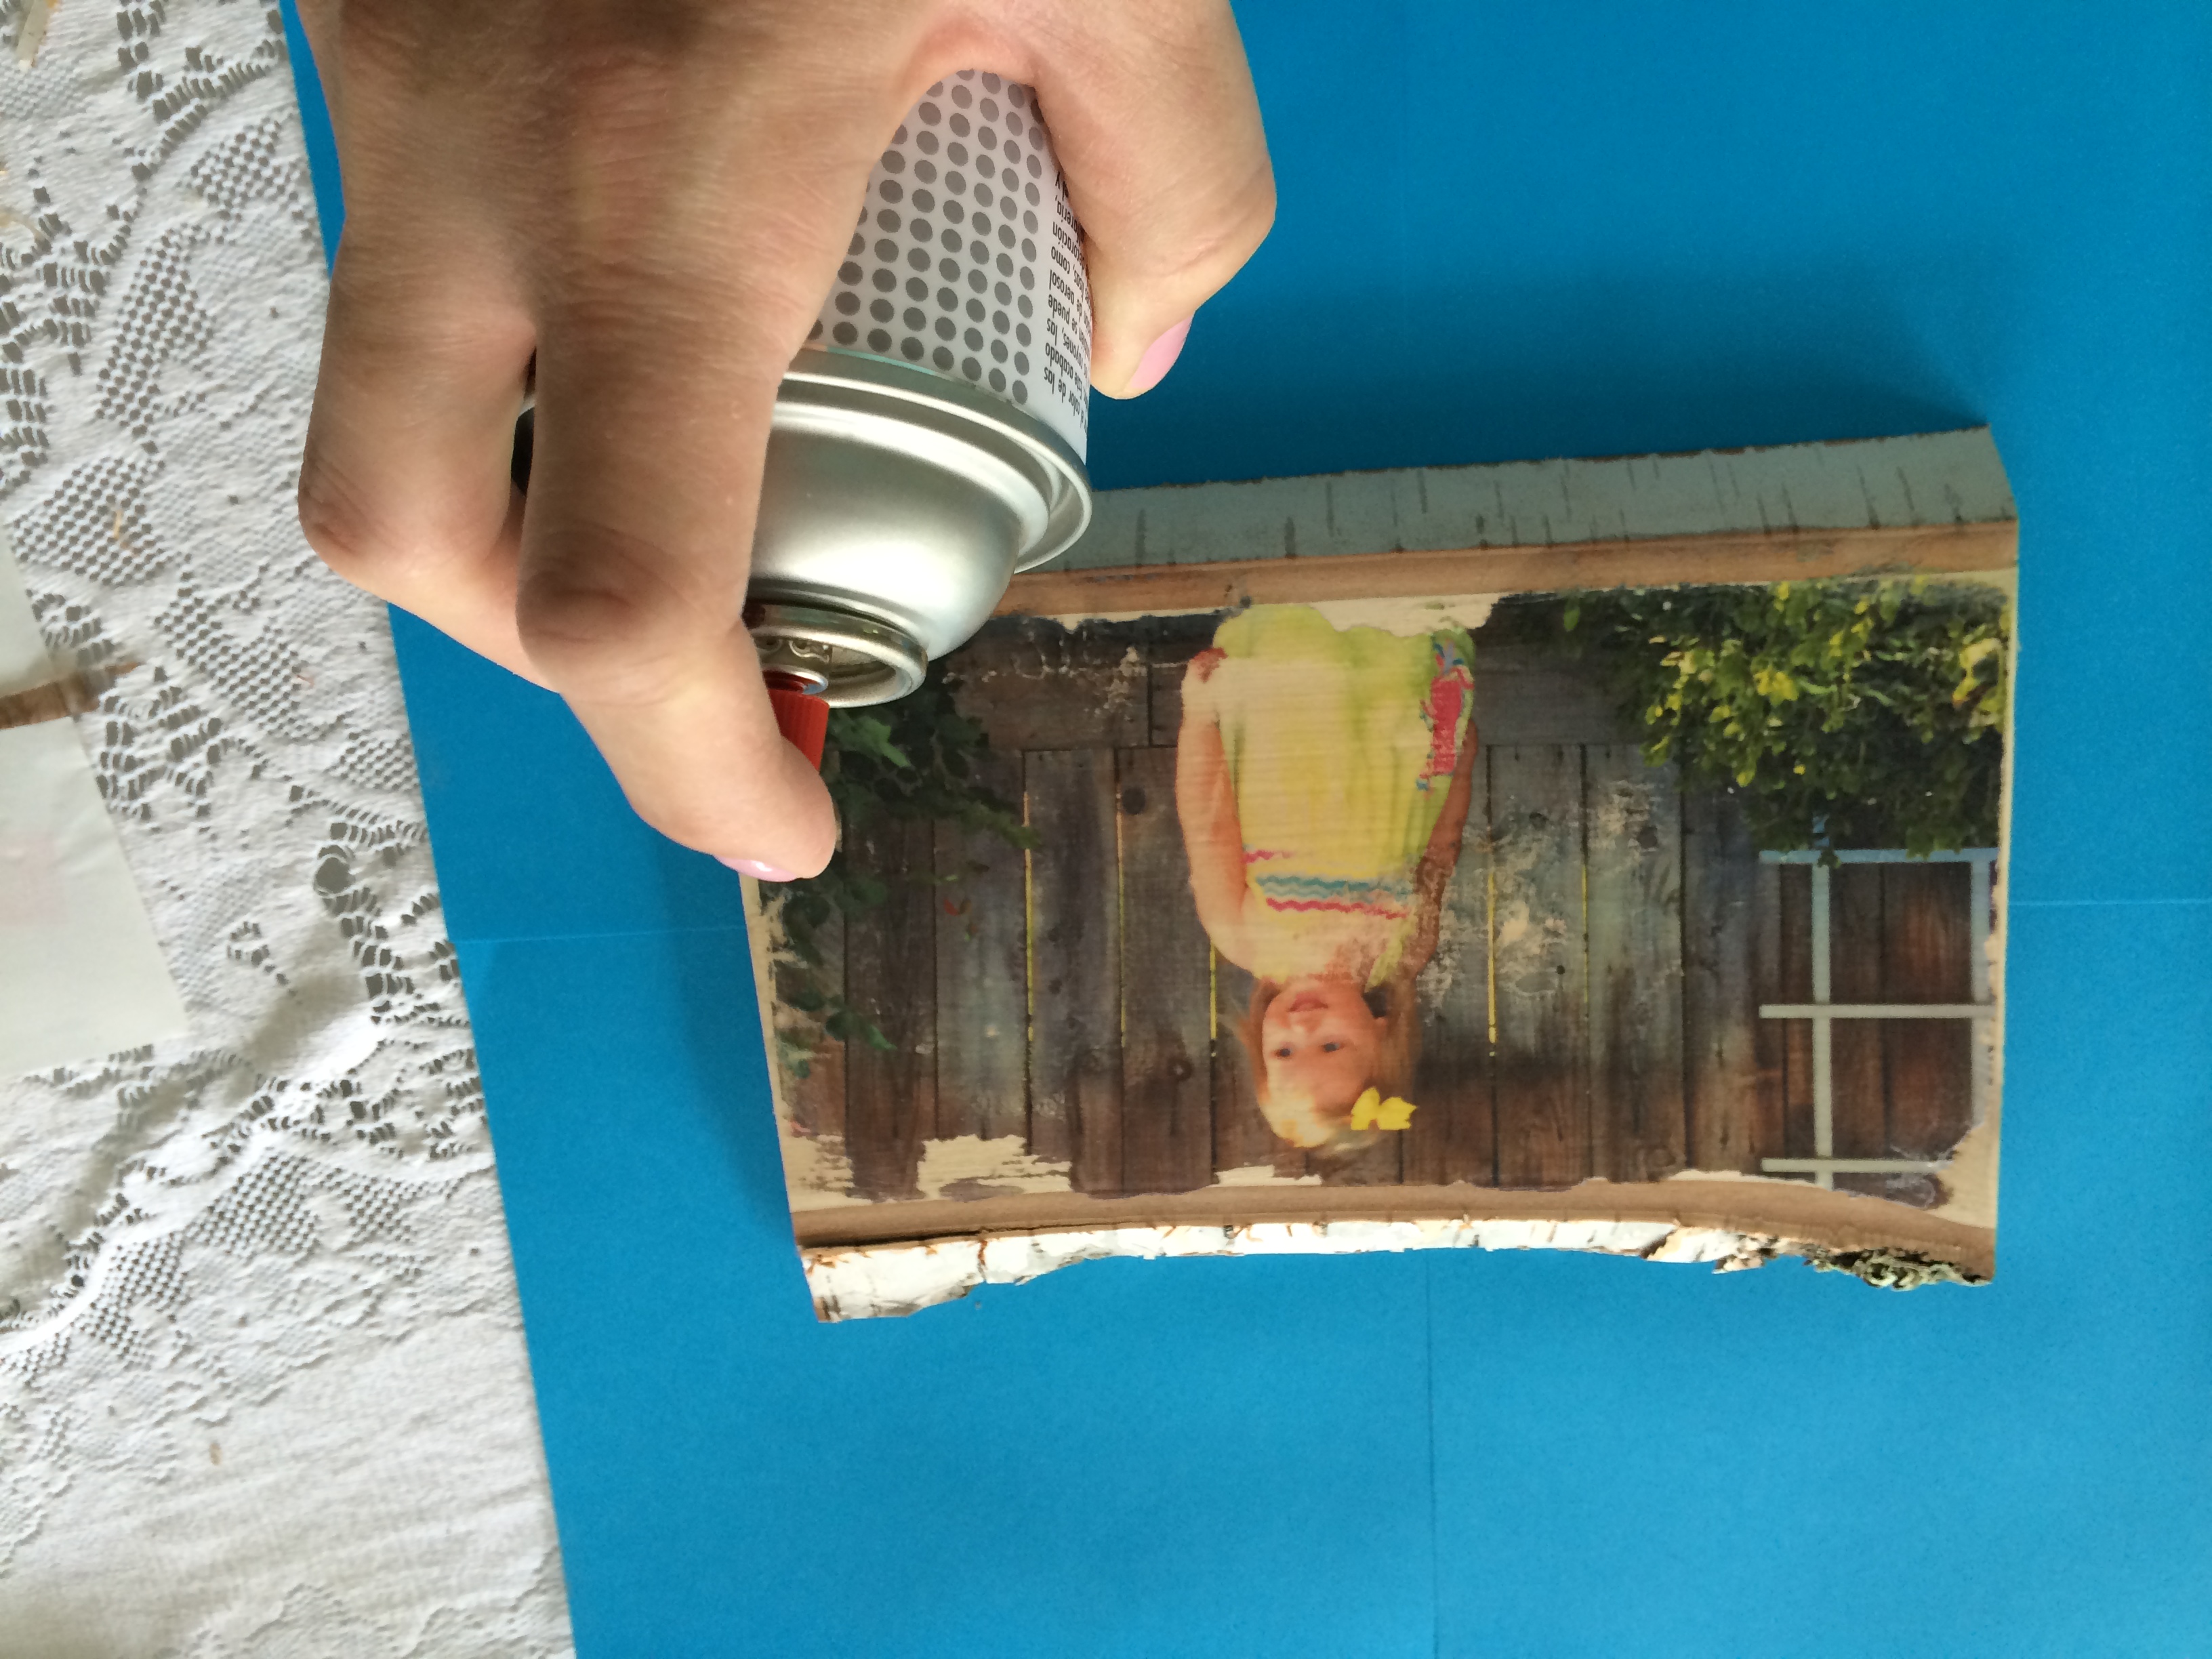
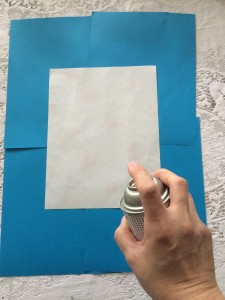
3. Spray the back of the paper with an even coat of the spray-on sealer. Let it dry completely.
4. Use your foam brush to add a thin layer of glue on the entire backing and let it dry.

5. Time to print! Pick your favorite digital picture and print it on the paper you have prepped with the spray-on sealer and glue. You want to make sure you print on the side with the glue.
* Be careful not to smudge your picture once it has printed.

6. With a foam brush, apply the matte gel to the wood you are using. Make sure to coat the entire surface. 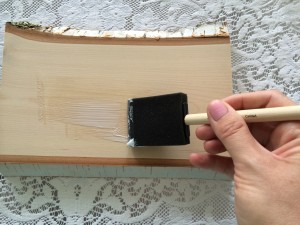
7. Immediately place your image face down on the wood. Do not pick up and replace. With your credit card and working from the center out to the edges, press and push out air bubbles. 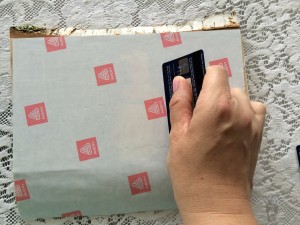
8. Let it dry for 90 minutes. Then slowly peel the paper from the wood.


9. Add a coat of clear sealer and you have a really cool gift!

What is your favorite photo gift idea? Do you have another great idea for a photo gift for Father’s Day? Share them here!